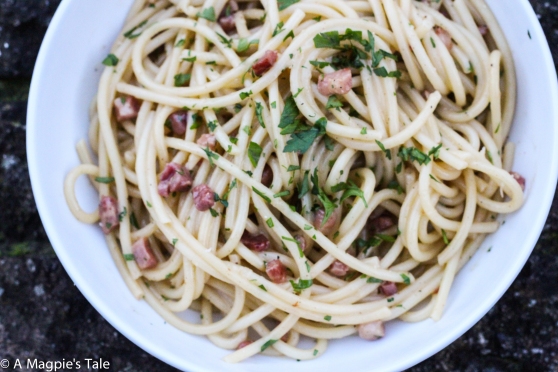
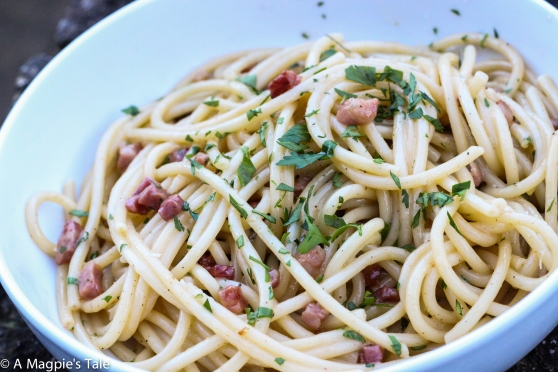
Bucatini Carbonara

carbonara cover lightroom

Carbonara is the Italian word for ‘charcoal burner’, so some people believe this dish was first made for charcoal workers in the Apennine mountains. The general view now, though, is that it is an authentic urban recipe that hails from Rome. Bucatini is a type of pasta that is thicker than spaghetti shaped like a small tube. I find it works better than spaghetti in a carbonara sauce, but that is entirely preference, fettuccine is brilliant with carbonara as well.

The secret to a top carbonara sauce is the quality of your ingredients. Try to get the best eggs, pancetta (smoked bacon), extra virgin olive oil, and best pecorino cheese you can get your hands on. The rest is just child’s play.

Do us a favour, please do not destroy this delicate dish by adding cream to it. This is an authentic Italian recipe and does not require any cream. I was shell-shocked that the English and American versions of carbonara all contained large glugs of double cream in the sauce. The egg yolk and pecorino cheese will create an incredible sauce for your pasta, the trick is to fold it into your pasta with the stove turned off. This is a dish that has to be eaten straight away, the sauce does not hold so well refrigerated or frozen. But with a recipe this easy to make, you are best off making it fresh all the time!

carbonara 3 lightroom

READY TO COOK?

  1. Heat the oil and butter in large frying pan over a medium heat and fry the pancetta for 8 minutes, stirring occasionally, until golden and crispy. Set aside.
  2. Whisk the eggs and half the cheese in a bowl. Add the parsley and plenty of black pepper. Set aside.
  3. Cook the pasta in a large pan of boiling, salted water until al dente. Drain well and tip it back into the same pan.
  4. Tip the contents of the pancetta pan into the pasta, then pour in the egg mixture. Mix everything together for 30 seconds with a wooden spoon. The heat from the pasta will be sufficient to cook the egg to a creamy coating.
  5. Season with salt and pepper and serve immediately with the remaining cheese sprinkled on top.

pancetta 3 lightroom

INGREDIENTS

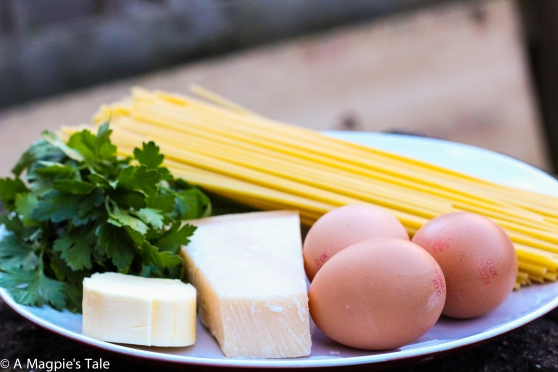
  • 5 tablespoons of extra virgin olive oil
  • 3 tablespoons unsalted butter
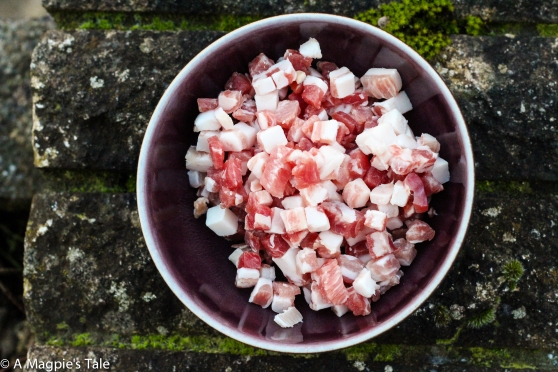
  • 250g diced pancetta
  • 4 eggs

bucatini ingredients lightroom

  • 6 tablespoons freshly grated pecorino cheese
  • 4 tablespoons finely chopped flat-leaf parsley
  • 500g bucatini
  • Sea salt and black pepper
carbonara 3 lightroom

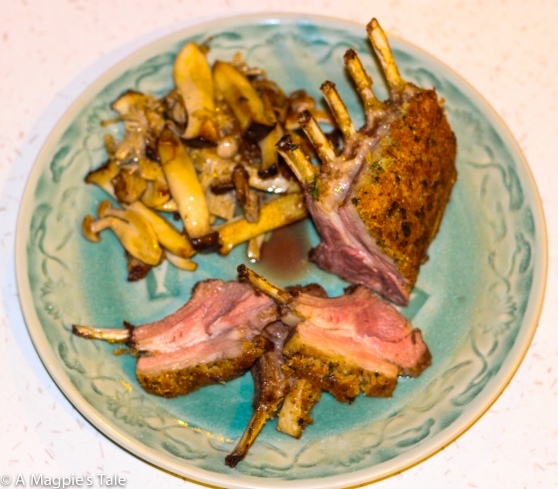
French-trimmed rack of lamb with Parmesan herb crust

rack of lamb cover 2 lightroom

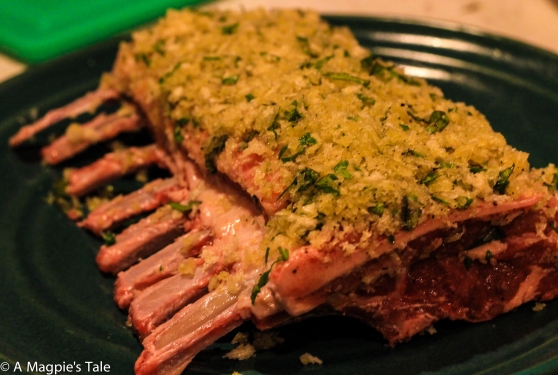
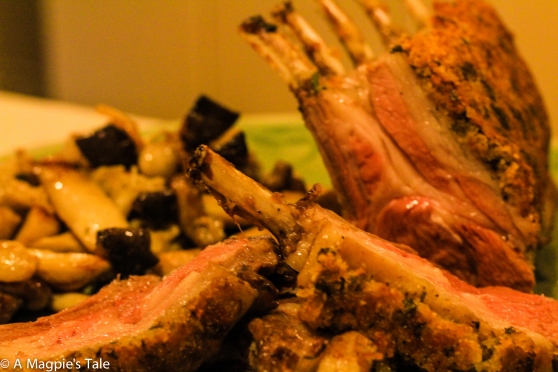
This is so easy with mouth watering results. I simply love racks of lamb and this is a simple step-by-step recipe with brilliant results. You gotta love tender and juicy lamb with a crispy crust. The Parmesan cheese and fresh herb crust work ever so well with lamb. The meat will melt in your mouth and the crust adds a bit of crunch. Rosemary and thyme work ever so well with lamb and if you get your hands on some of the fresh variety, you will reap the rewards of this pungent herb. I didn’t have any in my back yard, so I picked some fresh parsley and basil from my garden instead which also worked a treat! I like my lamb cooked medium-rare, and boy did they come out juicy! Pair it up with a medley of mushrooms or any veg you desire and you will be singing.

READY TO COOK?

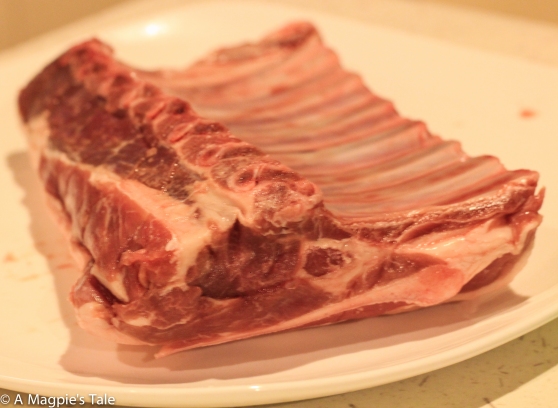
  1. Preheat the oven to 180ºc.
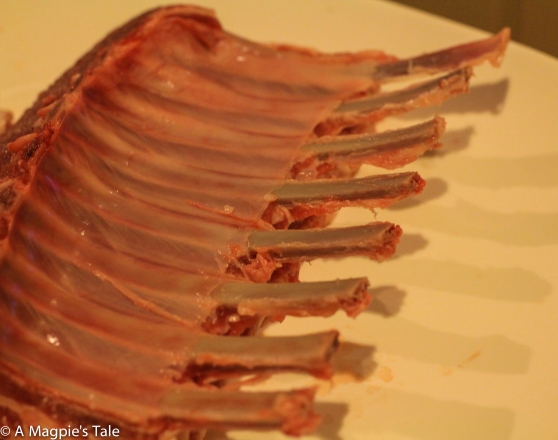
  2. With a super sharp knife, french-trim the rack of lamb.

lamb rack raw lightroom

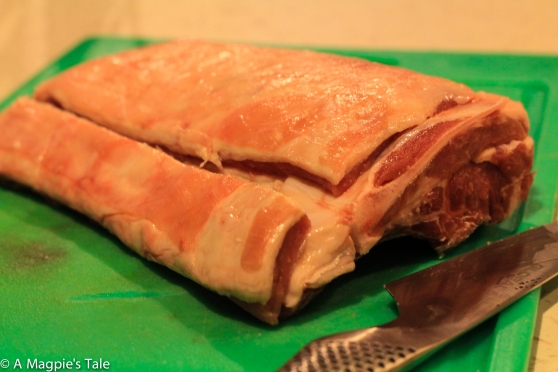
  1. Cut through the fatty side of the rib to the bone, from one side the the other.

lamb rack raw carve lightroom

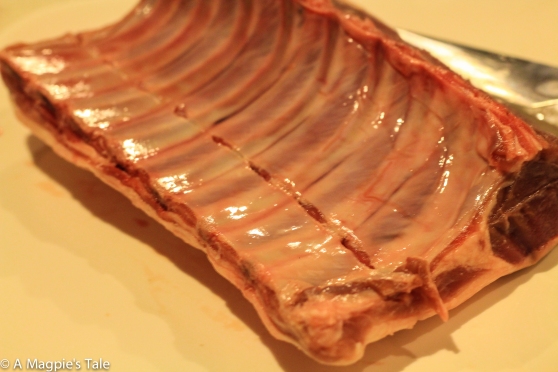
  1. Turn the rack over, so now the bones are sticking up. Start to cut along the bones and take all the flesh of the bones.

lamb rack raw carve 2 lightroom

  1. Slowly scrape the flesh of the bones and you should have perfectly ‘French-trimmed rack of lamb’.

lamb rack raw french trimmed lightroom

  1. Season the lamb well with sea salt, black pepper, and olive oil.
  2. In a large frying pan, fry the lamb for about 3 minutes on each side until browned. Pop them on a plate to cool down.
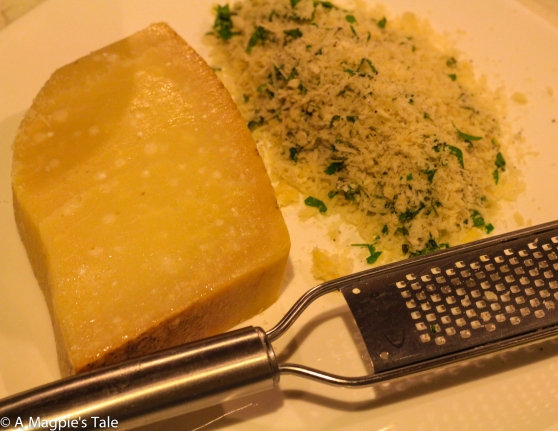
  3. In a bowl, mix the Parmesan cheese, garlic, herbs, small drizzle of olive oil, and bread crumbs together.

crust lightroom

  1. Pat the herb crust onto the fatty side of the lamb.

crust on lamb lightroom

  1. Pop the lamb onto a baking tray and roast for about 20 minutes.
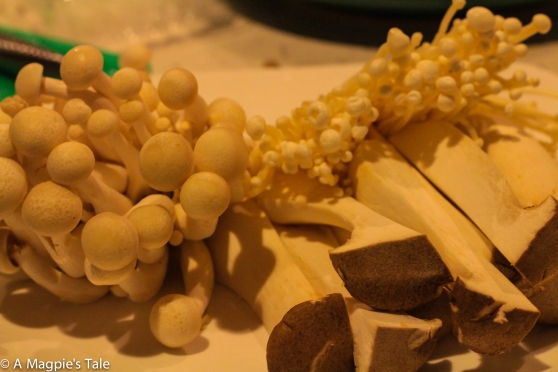
  2. While the lamb is cooking, chop up a mixture of mushrooms.

mushrooms lightroom

  1. Heat up a large frying pan with olive oil and cook the mushrooms until lightly browned. Add some crushed garlic and a small knob of butter to the pan. Season well with sea salt and black pepper.
  2. When the lamb is cooked, rest the meat for 5 minutes by covering the rack with some foil.
  3. Carve these beauties and serve them on a warm plate.

rack of lamb 1 lightroom

INGREDIENTS

  • 1 rack of New Zealand lamb
  • 2 handfuls of bread crumbs
  • 2 cloves of garlic (crushed)
  • 1 small handful of fresh herbs (rosemary and thyme works best)
  • 1 small handful of Parmesan cheese
  • olive oil (use a good one)
  • black pepper
  • sea salt
  • butter
  • mixture of mushrooms

rack of lamb cover 2 lightroom

Mussels in white wine and garlic

mussels lightroom

I simply love seafood, especially when it is fresh. I want to show you a very simple recipe to get the best out of your mussels. The key to seafood is without a question freshness, the rest is so easy! When you buy your mussels cook them on the same day to get the best out of these beauties. Seafood is generally already so tasty, so there isn’t too much you need to do to produce a fantastic dish. Another little secret is to not over-cook them, they have been living in the sea and are delicate, so you need to be gentle with them. Most seafood is cooked within 3-5 minutes and mussels require that very same treatment.

Did you know that seafood is also extremely heathy for you? The old ladies in Japan and Sicily have a wonderful seafood diet and seem to out-live most of the world’s population. Mussels are an inexpensive, sustainable shellfish that gives a boost to your immune system and your brain. Check out this simple recipe to make ‘Moules Marinière’.

READY TO COOK?

  1. Place all your mussels into your sink and fill it up with cold water. Clean them thoroughly and throw away any of the mussels that have broken shells.
  2. Pull all the beards from the mussels.
  3. Drain the mussels and pop them into a colander.
  4. Pop the mussels into a large pot.
  5. Add the butter, garlic, chopped shallots and white wine. Crank the heat on high and cover the pot with a lid.
  6. When the pot starts to steam, cook the mussels for 3-4 minutes moving them around every now and then.
  7. Once the shells are open, that means they are ready to eat.
  8. Finish the mussels off with a splash of extra virgin olive oil and some freshly ground pepper.
  9. Stir them well and serve them into bowls.
  10. Sprinkle some freshly chopped parsley on top and serve straight away.

INGREDIENTS (serves 2)

  • 1 kg fresh mussels
  • 1 glass of good white wine
  • 1 shallot – finely chopped
  • 1-2 cloves of garlic – finely chopped
  • 1 hand-full of chopped up parsley
  • black pepper
  • extra virgin olive oil
  • 1 knob of butter
  • 1 table spoon of finely chopped up parsley

mussels lightroom

Fig and pomegranate salad

Fig & Pomegranite salad 3 lightroom

Time for a detox? Or maybe you are looking a for a light and fruity salad bursting with flavour. Pomegranates have always been been highly prized for their flavour, but the recent emergence as a highly nutritious super food, they are packed with anti-oxidant vitamins. Figs are an incredibly luscious fruit, with a delicate aroma and sweet flavour. They originally hail from Asia but are now grown across the Mediterranean. In the search for a sweet fruity salad, I present to you the fig and pomegranate salad. This dish is a Mediterranean inspiration that can be found around the coast of Italy, Greece, and Turkey. Gently toss some watercress, pomegranate, and figs together. Drizzle some balsamic vinegar and the best extra virgin olive oil you can get your hands on and serve straight away. Super easy!

READY TO COOK?

  1. Rinse your figs and salad leaves under cold running water.
  2. Cut your figs into equal slices, around 6 pieces per fig.
  3. In a separate bowl, gently take out the pomegranate out of it’s shell. Discard the white membrane.
  4. Scatter the figs and pomegranate on top of the leaves.
  5. Drizzle a small amount of extra virgin olive oil and balsamic vinegar on the salad.

INGREDIENTS 

  • 2 figs
  • half a pomegranate
  • 200g watercress or green salad leaves
  • extra virgin olive oil
  • balsamic vinegar

Fig & Pomegranite salad 2 lightroom

Penne with sun-dried tomato pesto and black olives

penne sundried 4 lightroom

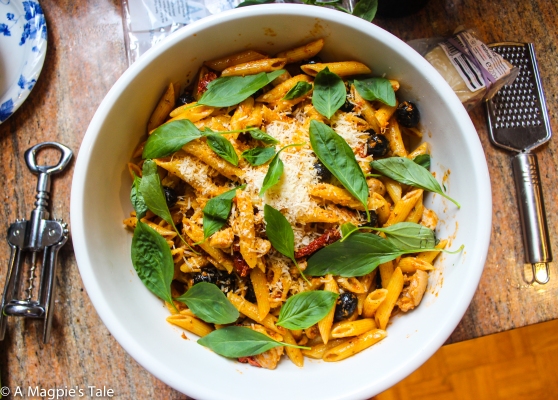
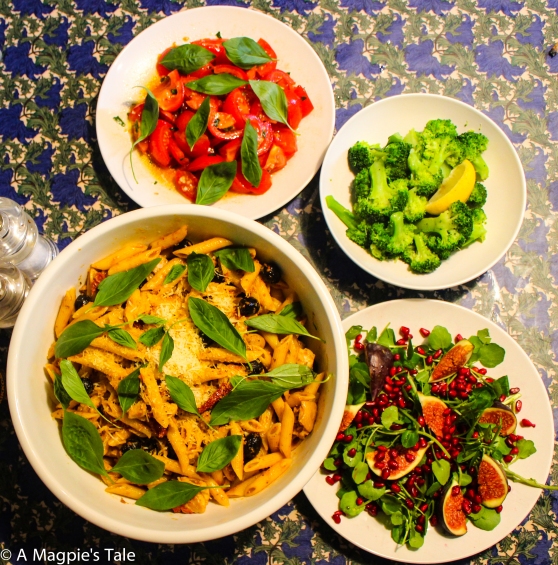
Who doesn’t love pasta? Italian food has to be one of my all time favourite cuisines in the world. The ethos is to use simple but the best ingredients you can get your hands on. Get good quality pasta rather than the cheapest in your supermarket. Source the best olive oil you can find and you are already half way to making extremely good Italian food. I use sea salt flakes and freshly ground black pepper instead of the table salt and pepper variety, trust me you really can taste the difference. Fresh herbs is also an essential secret of mine, get your hands on some fresh Italian basil to put this dish into over-drive!

This recipe has to be one of the easiest and most rewarding dishes ever. You can make it all under 15-20 minutes and marvel in delight that you didn’t spend a fortune in a restaurant for something similar. Get those creative juices flowing and start cooking!

To get yourself ready (I have to stress this again), source good ingredients. Get the best penne pasta out there, sun-dried tomatoes, black olives, sun dried tomato pesto, fresh Italian basil, extra virgin olive oil, and Parmesan cheese.

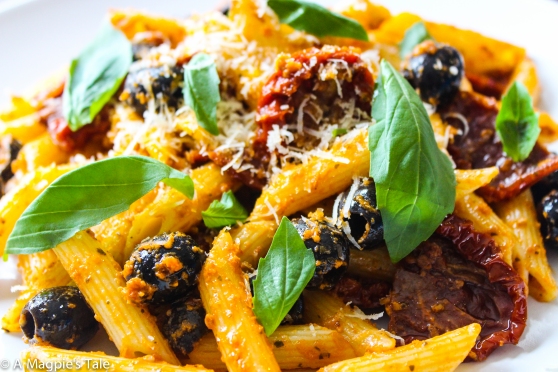
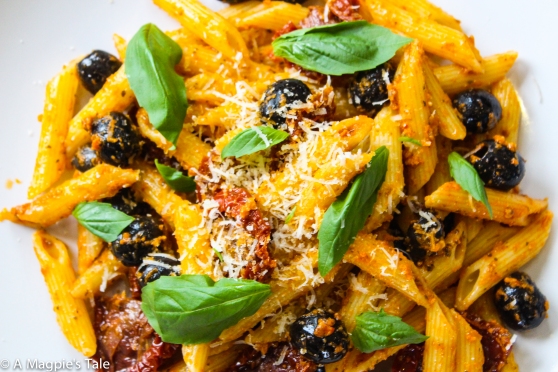
Boil the pasta until al dente (10-12 min), mix in the olives and sun-dried tomatoes, then the pesto. Season well with sea salt and fresh black pepper. Top it off with Parmesan cheese and fresh basil leaves. If you like a bit of heat, add some dried chilli flakes on top. Enjoy this dish with a fresh salad and a crisp glass of white wine. Bellissimo!


penne sundried lightroom

READY TO COOK?

  1. Fill a large pot half way with water, add a tea-spoon of salt and splash of olive oil, then bring to the boil.
  2. Put the pasta into the water and set to a medium heat. Cook according to packet instructions until al dente.
  3. Drain the pasta and bring it back to the pot.
  4. Add a splash of olive oil and stir in the olives and sun-dried tomatoes.
  5. Add the pesto paste and stir well. Season with sea salt and black pepper.
  6. Pop the pasta mix on a large serving dish.
  7. Shave a ton of Parmesan cheese on top and sprinkle basil leaves all over the pasta.
  8. Serve with extra parmesan on the side.

penne sundried 3 lightroom

INGREDIENTS

  • 350g penne pasta (fresh or good quality dried)
  • 1 tin of black olives (pitted)
  • 1 small jar of sun-dried tomatoes (roughly chopped)
  • extra virgin olive oil (the best you can get)
  • 1 hand-full of fresh basil leaves
  • 1 jar of sun-dried tomato pesto
  • 40g Parmesan cheese (and extra on side)
  • sea salt and black pepper

penne sundried 6 lightroom

Crispy Pork Belly

pork belly lightroom

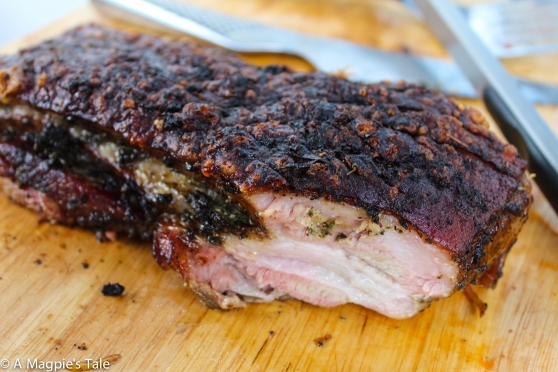
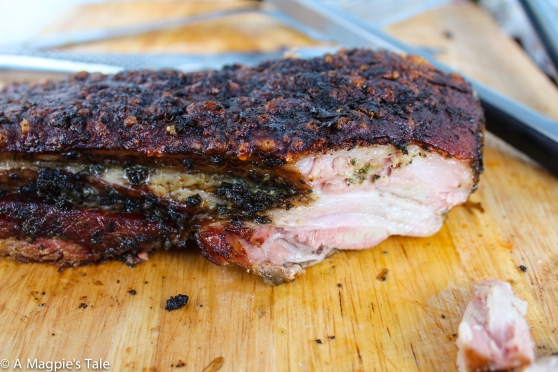
This is so easy with mouth watering results. You gotta love tender and juicy pork belly with a crispy crackling. The meat will melt in your mouth and the crackling adds a bit of crunch. Sage works ever so well with pork and if you get your hands on some of the fresh variety, you will reap the rewards of this pungent herb. For this recipe, I’ve made my own special seasoning for the pork belly. Using a pestle and mortar, pound up some garlic, sage, sea salt, and white pepper for a wicked seasoning. Add some extra virgin olive oil to loosen up the mix. Score the pork belly every 2 cm with a razor sharp knife. Get the mixture into the pork belly as deep as you can (without destroying it). Wrap it up with some foil and cook it under a low heat for 2 and a half hours (if you don’t have a barbecue, cook it for 3 hours). Pop this onto your barbecue and smoke it for another 10 minutes on each side under a low heat. Rest the pork belly for a couple minutes, then slice it up. Now watch it disappear within minutes. 

READY TO COOK?

  1. Preheat the oven to 160ºc.
  2. In a pestle and mortar, pound the sage leaves, garlic, white pepper, and sea salt until you have a bright green paste. Add a big dash of olive oil to loosen up the paste.
  3. Score the pork belly every 2 cm with a very sharp knife. You will need this as the pork skin can be quite tough.
  4. Mix the paste all over the pork belly with your hands.
  5. Pop the pork belly onto a roasting tray and wrap it up with a double layer of foil.
  6. Cook the pork belly in the oven for about 3 and a half hours. If you have a barbecue cook it in the oven for 2 and a half hours, then grill it on the barbecue for 10 minutes on each side. Both ways work a treat, I prefer the barbecue method as it will be a bit more charred and smokey.
  7. Once the pork belly is cooked, rest it on a chopping board for about 3 minutes.
  8. Start slicing the pork belly into your desired slices and serve straight away.

pork belly 2 lightroom

INGREDIENTS

  • 2kg pork belly
  • 1 handful of fresh sage
  • 1 clove of garlic
  • olive oil (use a good one)
  • white pepper
  • sea salt


pork belly lightroom

Thai beef stir fry with oyster sauce – Nua Putt Naman Hoi

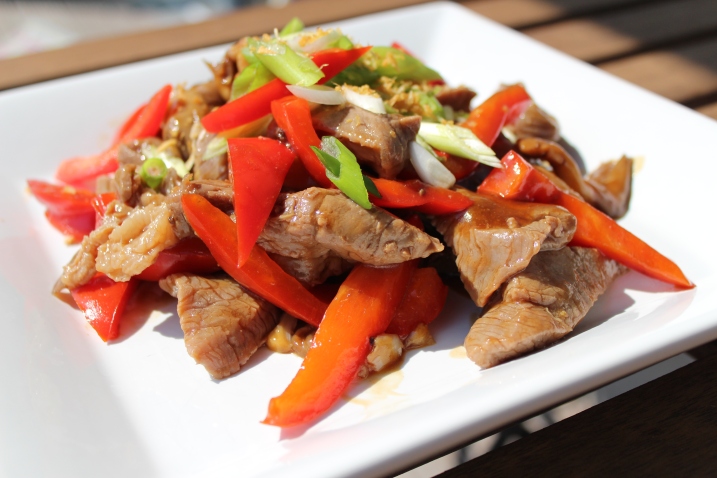
Oyster Beef cover shot

Beefy goodness with crunchy peppers.

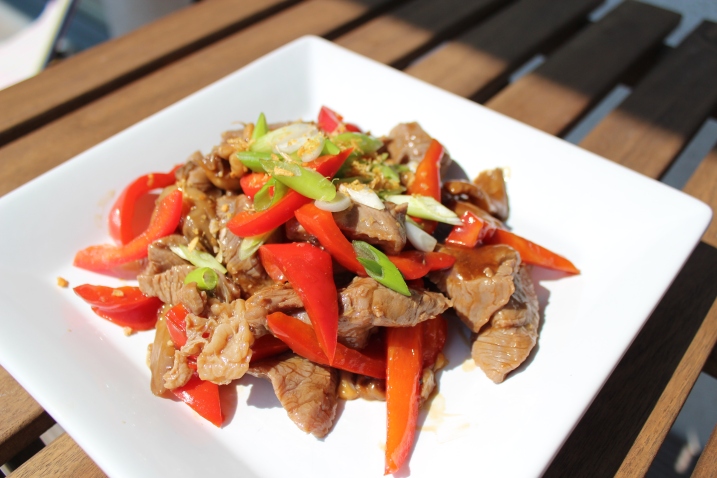
If you are a lover of Thai food and fancy a bit of beef, look no further. This is a classic dish eaten all over Thailand. The Thai name ‘Nua Putt Naman Hoi’ translates into ‘beef stir-fried with oyster sauce. This is one of the street foods you can find anywhere in Thailand. It is usually eaten with Jasmine rice and is commonly eaten as a single dish, but can be equally satisfying as a sharing dish.  It is simply so easy to cook at home. The flavours are rich, slightly sweet and meaty. Fry this up with some oyster mushrooms and bell peppers to give the dish some balance. Pop in some garlic and chilli to give your stir-fry a bit of attitude. Then finally top it up with spring onions to add a bit of crunch and freshness.  Add a splash of oyster sauce and you have an amazing dish made in under 5 minutes. Optionally you can marinade the beef in some oyster sauce for an hour to give the beef more flavour and tenderness, but is not necessary if you want the dish straight away. This dish is so easy and satisfying.

Oyster Beef

The beefy one.

READY TO COOK?

  1. Chop the beef into 2 inch pieces.
  2. (Optional) Marinade the beef with 1 table spoon of oyster sauce, 1 tea spoon of sugar, 1 tea spoon of light soy sauce for 1 to 12 hours.
  3. Chop up all your vegetables, put to side.
  4. Smash up 3 garlic cloves with the side of your knife, finely chop them up.
  5. Roughly chop up 1 bird’s eye chilli.
  6. Heat up your wok or frying pan on a high heat with 1 table spoon of vegetable oil.
  7. Fry the garlic and chilli for 20 seconds.
  8. Throw in the oyster mushrooms and stir constantly. Cook for 1 minute.
  9. Throw in the peppers and stir constantly. Cook for 2 minutes.
  10. Pop in the beef and stir constantly. Cook for 2 minutes or until beef is about medium or rare.
  11. Pop in the 2 table spoons of oyster sauce, 1 table spoon of  light soy sauce, 1 tea spoon of sugar, dash of white pepper and 1 table spoon of water. Stir well.
  12. Place the stir fry on a warm plate and sprinkle the spring onions on top and serve straight away.
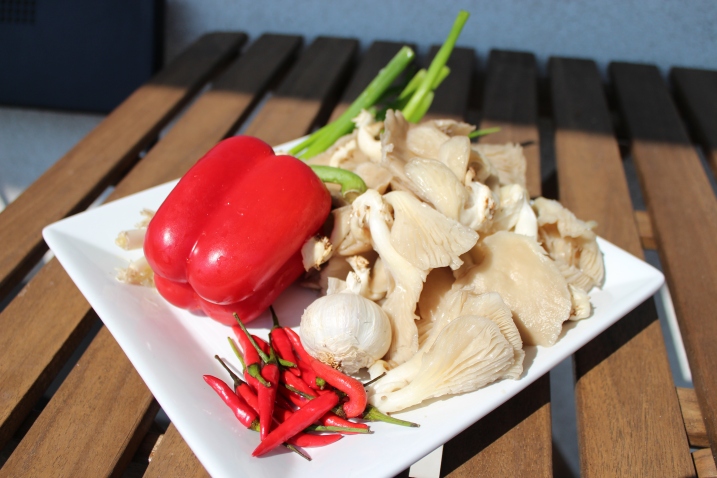
ingredients

Simple and fresh ingredients.

  • 250g beef (use sirloin, rib-eye, or rump) – chopped into 2 inch pieces
  • 150g oyster mushrooms – washed
  • 1 red bell pepper – chopped into 2 inch pieces
  • 3 cloves of garlic – finely chopped
  • 1 bird’s eye chilli (more if you dare) – roughly chopped
  • 2 spring onions – roughly chopped
  • oyster sauce
  • light soy sauce
  • white sugar
  • white pepper
  • 1 table spoon of vegetable oil
Oyster Beef cover shot

Enjoy your dinner!

Roast Greenwich chicken with thyme and pancetta

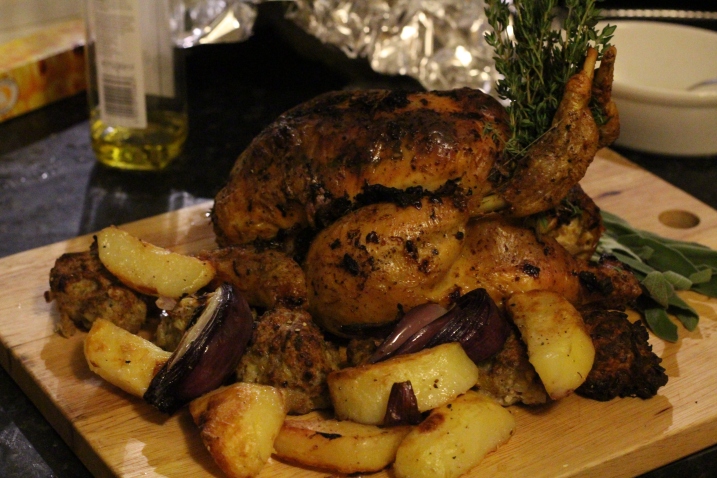
IMG_3268

Bird is the word.

Christmas is approaching, so it’s time for a little warm up. This recipe is the perfect Sunday roast, totally easy and super tasty. The logistics of a roast is simple. Pick a good meat, jazz it up with flavour, then whack it in the oven and time it. I every now and then check how it is going and drizzle the oils and juices on top so it doesn’t go dry. This recipe is totally delicious and the principle is to get fantastic flavours right into the bird. I am using a corn-fed chicken in this recipe as you can really taste the difference with free-range birds. Stuff the bird with thyme, garlic, lemon zest, and pancetta to unleash a paramount of flavours. Pair this up with some home made stuffing (I will show you how to make this as well on the next blog) and some roast potatoes, you really can’t ask for more!

READY TO COOK?

  1. Preheat the oven to 220ºC and get a good big sized baking tray.
  2. Using your fingers, part the breast skin from the breast meat. Be gentle as you will rip the skin.
  3. In a small bowl, grate the zest of 1 lemon. Keep the pealed lemon to the side.
  4. Hand pick the thyme leaves into the same bowl.
  5. Finely chop the garlic and add to the bowl.
  6. Add the pancetta, olive oil, and season well with black pepper and sea salt.
  7. Add the butter and mix it all together with you hands.
  8. Push this mix into the space you have made in the chicken, rub it all over the chicken as well.
  9. Stuff half a lemon into the cavity with any remaining herbs. Quarter the rest of the lemon for the chicken to sit on.
  10. Season the chicken one more time with black pepper and sea salt.
  11. Cook the chicken for 60-80 minutes depending on the size of the chicken. (60 minutes for 1kg, 80 minutes for 1.6kg, 90 minutes for 1.8kg)
  12. Baste the chicken every 20 minutes with the juices that have flowed to the bottom of the baking tray.
  13. When the chicken is cooked, rest the bird for 10 minutes before serving.
  14. Serve it with some roast potatoes, stuffing (recipe to follow), and some gravy.

INGREDIENTS

  • 1kg chicken, preferably corn-fed or free range
  • 200g pancetta (diced)
  • 1 hand full of fresh thyme leaves
  • 3 cloves of garlic (finely chopped)
  • 100g softened butter
  • olive oil
  • sea salt
  • black pepper
  • 1 lemon
IMG_3268

So simple, so good!

Seafood Risotto – alla Pescatora

IMG_3109

Seafood and risotto is such a lovely combination which is perfect as a light lunch or dinner.  The aroma and flavours will make you feel like you are in the Mediterranean sipping a glass of white wine, listening to the waves crashing onto the beach. This recipe is so easy and tasty you will never need to splurge in expensive restaurants anymore!

My secret to a good risotto is all in the stock. Use a great vegetable stock instead of water and you will end up with a magical dish filled with a beautiful scent. Chop up the seafood so they are in small bite sizes and remember to never overcook them. I blanch the seafood in salted boiling water for about 30 seconds and add it to risotto last to ensure it is still tender and juicy.

Risotto is a popular Italian delicate rice dish cooked in broth to a creamy consistency. To make good risotto isn’t difficult, but will require your full attention. You can’t just whack it in a pan, crank up the heat, and come back in 20 minutes hoping it is all done. It actually takes a fair bit of TLC, but then again, all food should be given the same treatment. You should use good quality ingredients; Arborio rice and a top vegetable stock to produce a good risotto. Gently stir it under a low to medium heat while you slowly add the ingredients. If you treat your food with love, the results are always overwhelmingly rewarding. Cooking a good risotto is all about this philosophy. 

READY TO COOK?

  1. Clean your seafood under some cold water.  Roughly chop up the seafood into little bite sizes.
  2. Heat the stock up in a pan to a simmer.
  3. In a large pan, heat up some olive oil to a simmer and fry the garlic, rice, and onion for 2 minutes.
  4. Add the white wine and stir until liquid is absorbed.
  5. Add a ladle of stock until liquid is absorbed, continue to do so until stock is all used up.
  6. In a separate pot, fill it half way with boiling water and a pinch of salt. Blanch the seafood for 30-40 seconds and then drain it in a colander.
  7. Add the saffron, butter, parsley, and half the Parmesan cheese to the risotto, stir until liquid is absorbed.
  8. Cook the rice until it is al dente. Season with sea salt and black pepper. Add the seafood and stir in well.
  9. Place on a warm plate and shave some fresh Parmesan on top before serving.

INGREDIENTS (serves 2)

  • 150g seafood (anything you desire, I love it with squid, mussels, and prawns)
  • 200g Arborio rice
  • half onion – finely diced
  • 1 clove of garlic – finely chopped
  • 5 table spoons of white wine (not too cheap, something you would drink)
  • 600ml (1 pint) of vegetable stock
  • 40g Parmesan cheese – grated
  • 1 table spoon of finely chopped up parsley
  • 1 pinch of saffron strands
  • 3 knobs of butter
  • sea salt and pepper

IMG_3109

Caribbean Jerk chicken with rice and beans

IMG_2652

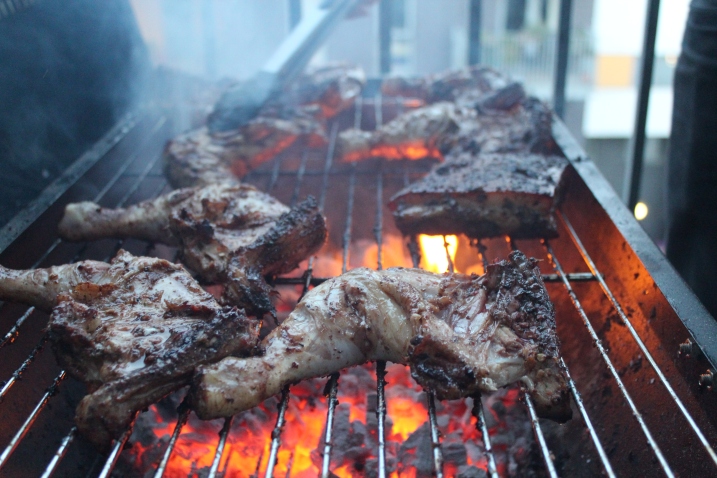
The secret to Jerk chicken is all-spice or pimento as it is called in Jamaica. It combines 5 powerful spices that will put your taste buds into overdrive. Jerk chicken is a celebration of outdoor cooking, perfect on a barbecue that has a lid so you can smoke them up. You know a bit of heaven has landed when the majestic smell of Jerk chicken floats through the air. If you have an outdoor barbecue then you are in for a treat, but if you don’t, you can try cooking it on a griddle pan or in the oven instead.

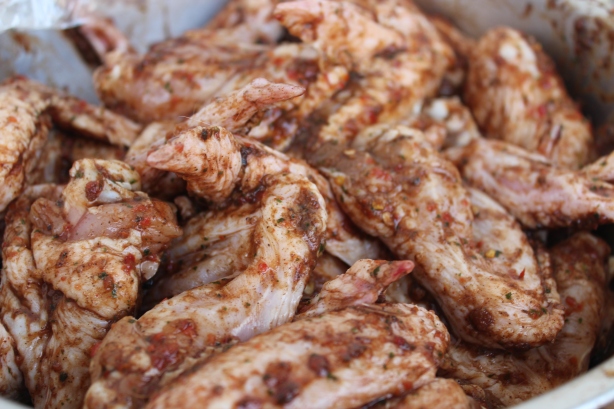
Jerk chicken is a combination of heat, spice, and herbs. Another key ingredient is the all mighty scotch bonnet. Scotch bonnet is a chilli pepper found mainly on Caribbean islands. It is also known as Guyana which means ball of fire. Fresh ginger, coriander, lime juice, garlic, dried chilli, and honey all make this a punchy unforgettable sauce. Marinade the chicken for 1 day for best results, but if you are in a rush, 2 hours will do.  A little tip for you is to wear some gloves when mixing the marinate sauce or your hands will burn from this fiery sauce.

Pair the Jerk chicken with some rice and beans, grilled corn, and a fresh salad. You should try this dish with my fresh tomato salad recipe, it really works! Get ready for a barbie Caribbean styles!

READY TO COOK?

  1. In a food processor, pop in all the ingredients for the marinade, and blend well until it becomes a thick paste.
  2. Slash the chicken legs with small cuts so the sauce can penetrate the chicken.
  3. Wear a pair of plastic gloves and mix the marinate into the chicken. Cover and refrigerate for 1 day. Keep a small bowl of this marinade on the side, cover up and refrigerate as well. This will be your dipping sauce when the chicken is cooked.

IMG_2597

  1. When they are ready to cook, prepare your rice and beans.
  2. Put all the rice and beans’ ingredients in a rice cooker then allow it to cook. If you don’t have a rice cooker, in  a medium sized pot with a lid, place all the ingredients in there and cook it on a simmer for 15-20 minutes until the rice has soaked up all the liquid. Make sure you cook it on a low temperature and cover it up with a lid.
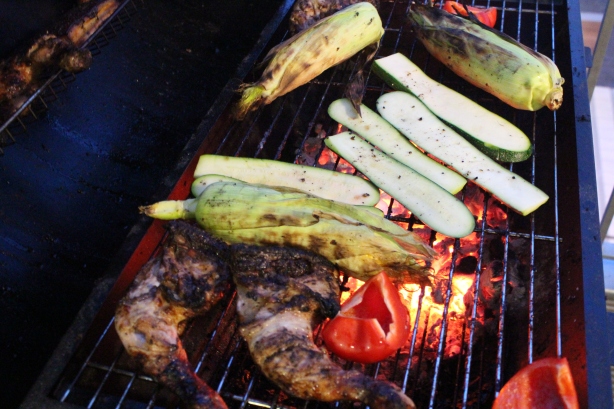
  3. Now it is time to cook the chicken. In your barbecue, make sure the charcoals are at a low temperature so it won’t burn your Jerk chicken straight away. The idea is to slow cook the Jerk chicken and smoke it for about 20 minutes. You should check on them constantly, twisting and turning them around the sizzling flames. You should baste them with some olive oil every 5 minutes to ensure juicy unburnt skin.
  4. With 10 minutes into cooking the chicken, place the corn cobs on the grill. Cook them for 10 minutes along side the chicken.
  5. When the chicken is cooked, squeeze fresh lime juice all over the chicken.
  6. Serve straight away with the corn, rice & beans, and a wicked salad of your choice.

IMG_2662

INGREDIENTS (Serves 4)

  • 4 large chicken legs (thigh & drum stick)
  • 4 corn cobbs

JERK CHICKEN MARINATE

  • 2 tablespoons of grounded allspice berries
  • 1 tablespoon of black peppercorns
  • half a tea spoon of cinnamon
  • 1 tablespoon of dried chilli flakes
  • half tablespoons of brown sugar (white is fine too)
  • 2 tablespoons of honey
  • 1 handfull of coriander
  • 4 scotch bonnets
  • 1 clove of garlic
  • 4cm piece of fresh ginger pealed
  • 4 spring onions, finely chopped
  • extra virgin olive oil
  • teaspoon of sea salt
  • juice of 1 lime

IMG_2582

RICE & BEANS

  • 200g rice
  • 4 spring onions – roughly chopped
  • 400g coconut milk
  • 2 cloves of garlic – finely chopped
  • 2 (400g) cans of kidney beans, drained
  • 1 whole scotch bonnet chilli pepper
  • 1 table spoon of grated fresh ginger
  • 3 cups of chicken stock
  • 1 table spoon of all spice
  • 1 teaspoon of fresh or dried thyme (optional)

IMG_2652